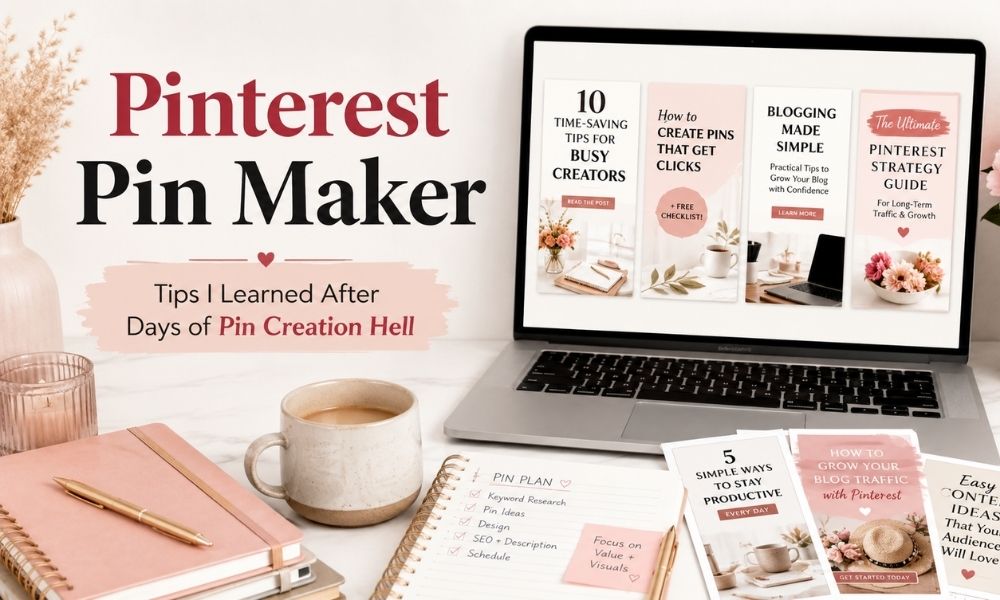
Pinterest Pin Maker: How I Create Stunning Pins Using PinGenerator, Ideogram, and Flow.io
Create beautiful Pinterest pins online for free with this easy Pinterest Pin Maker. Choose a template, add your headline, customize the colors, upload your image or logo, and download your pin as a PNG or JPG.
This free tool is made for bloggers, affiliate marketers, content creators, and small business owners who want to create scroll-stopping Pinterest pins without starting from scratch in Canva, Photoshop, or complicated design software.
Use the Pinterest Pin Maker below to design your pin, then continue reading for Pinterest pin size tips, design ideas, traffic advice, and other Pinterest pin maker tools I have tested.
Use the Free Pinterest Pin Maker Tool
Start by choosing your canvas size, selecting a template, writing your pin headline, and customizing your design. You can also upload your own background image and logo before downloading the final pin.
One-page design tool
Pinterest Pin Maker
Create professional Pinterest pins with templates, text, backgrounds, logos, and instant PNG/JPG export.
Loading usage…
Canvas size
Template
Text
Background
Logo & branding
Files are processed in your browser. Connect the usage check to your backend before production launch.
How to Use This Free Pinterest Pin Maker
This Pinterest Pin Maker is designed to be simple. You do not need design experience, expensive software, or a complicated workflow.
- Choose your canvas size. For a standard Pinterest pin, use the 1000 × 1500 size.
- Select a template. Choose a style such as Blog Post, Affiliate Product, Real Estate, Recipe, Luxury, or Minimal.
- Add your pin text. Write your main headline, subtitle, label, brand name, and call-to-action.
- Customize the design. Change colors, text position, font style, overlay opacity, and accent color.
- Upload your image or logo. Add your own background image and branding if you want a more custom look.
- Preview your design. Make sure the headline is readable and the layout looks clean.
- Download your pin. Export the finished design as a PNG or JPG and upload it to Pinterest.
If you are creating pins for blog posts, you can use this tool together with your Pinterest SEO strategy and your Pinterest marketing strategy to drive more traffic back to your website.
Why I Built This Pinterest Pin Maker for Bloggers
When I started my second blog, I wanted to do better than my first. I knew that traffic was everything, and Pinterest was one of the fastest ways to reach new readers. What I did not expect was how much time creating pins could take.
Every week, I would spend hours trying to make pins for new blog posts. I had to resize images, find stock photos, overlay text, pick fonts, choose colors, and make sure each pin looked good on mobile. By the time I finished, I was mentally drained, and I had less time left for writing new content, improving old posts, or promoting my blog.
That is why I wanted a simpler Pinterest pin maker: a free tool that helps bloggers create quick, clean, branded pins without wasting an entire day on design.
The goal of this tool is not to replace every advanced design platform. It is to give bloggers a fast starting point. If you need a simple blog pin, affiliate pin, product pin, or social media graphic, you can create it directly from your browser.
Best Pinterest Pin Size
A common recommended Pinterest pin size is 1000 × 1500 pixels, which uses a 2:3 aspect ratio. Pinterest recommends this ratio because pins that are much taller than 2:3 may get cut off in people’s feeds. You can check Pinterest’s official product specs here: Pinterest product specs .
This free Pinterest Pin Maker includes multiple design sizes so you can create and repurpose content for different platforms:
- Pinterest Standard: 1000 × 1500
- Pinterest Long Pin: 1000 × 2100
- Instagram Post: 1080 × 1080
- Instagram Story: 1080 × 1920
- Blog Featured Image: 1200 × 675
If your main goal is Pinterest traffic, start with the standard 1000 × 1500 format. If you want to repurpose your design for other channels, export another version using the Instagram or blog image sizes.
Pinterest Pin Design Tips for Bloggers
Creating a pin is not only about making something pretty. A good Pinterest pin needs to be clear, readable, and connected to the article it promotes. Here are the design rules I use when creating pins for blog traffic.
Start With the Headline Before the Design
One of the biggest mistakes I made was choosing the template first and then trying to force the headline into it. Now I write several headline options before touching the design.
Instead of only writing:
Pinterest Pin Maker Tools
I would test stronger angles like:
- Pinterest Pin Maker Tools That Save Hours
- How I Stopped Spending All Day Making Pins
- Create Pinterest Pins Faster Without Design Skills
- My Pinterest Pin Workflow for Bloggers
- Pinterest Pin Tools I’d Use for a New Blog
The design should support the message, not the other way around. If the headline is weak, even a beautiful design may not get clicks.
Make the Pin Readable on Mobile
Most Pinterest users will see your pin on a phone. A design that looks good on a laptop can still fail if the text is too small, too thin, or placed over a busy image.
A readable Pinterest pin usually has:
- A short, clear headline
- Strong contrast between the text and background
- Simple fonts
- Enough spacing around the words
- No tiny paragraphs on the image
- No overly busy background behind the main text
Pretty fonts can be tempting, but readability matters more. If people cannot understand the pin in one second, they will probably keep scrolling.
Focus on One Idea Per Pin
Another mistake is trying to put the whole blog post on one pin. A pin should be one entry point into the article, not a full summary of everything inside it.
For example, if your article is about Pinterest pin makers, you can create several pins with different angles:
- Best Pinterest Pin Maker Tools
- How to Create Pins Faster
- Pinterest Design Workflow for Bloggers
- Stop Spending All Day Making Pins
- Create More Pins Without Hiring a Designer
Same article, different promise. This gives your post more chances to attract different types of readers.
Create Multiple Pins for the Same Blog Post
At first, I thought one blog post needed one pin. Now I think that is one of the easiest ways to limit your Pinterest traffic.
For important posts, create at least 3–5 pin variations. They do not need to be completely different, but they should test different headlines, colors, layouts, or emotional angles.
A good mix could include:
- One practical how-to pin
- One emotional pain-point pin
- One list-style pin
- One tool-focused pin
- One curiosity-driven pin
If you write about monetization, you can also connect your pins to topics like Pinterest affiliate marketing or how to monetize your blog from day one.
Use Pinterest Keywords Naturally
Pinterest is visual, but keywords still help the platform understand your content. Use clear phrases in your pin title, pin description, board title, and board description.
Good Pinterest keyword phrases might include:
- Pinterest pin maker
- Pinterest SEO
- Pinterest marketing strategy
- Blog traffic tips
- Pinterest tips for bloggers
- Create Pinterest pins faster
- Pinterest design tools
Do not keyword-stuff. Just make sure the pin clearly describes the topic and the benefit.
Keep Your Branding Consistent
My early pins looked like they came from several different blogs. Some were pastel, some were dark, some were corporate, and some were playful. There was no clear identity.
Now I try to keep consistency through:
- A small color palette
- Two or three main fonts
- Similar logo placement
- Similar text hierarchy
- Similar image style
This also saves time. When you already know your colors and fonts, you stop making those decisions from scratch every time.
Leave Breathing Space
A crowded pin feels stressful. A clean pin feels easier to understand.
A strong Pinterest pin usually needs one clear headline, one strong visual, good contrast, simple branding, and enough empty space around the design elements.
After finishing a pin, ask yourself: what can I remove? Many times, removing one extra element makes the design stronger.
Other Pinterest Pin Maker Tools I’ve Tested
This free Pinterest Pin Maker is a simple option for creating quick pins directly in your browser. But if you need more advanced AI graphics, automation, scheduling, or large-scale pin creation, there are other tools that can help.
PinGenerator
PinGenerator is useful when you want to create many Pinterest pins quickly. It focuses on generating Pinterest content for blogs, ecommerce, and affiliate websites. It can be helpful if you want to produce multiple pin variations from URLs or existing content.
I like tools like this when speed matters. However, I still recommend checking the headline, spacing, contrast, and mobile readability before publishing any generated pin.
Ideogram
Ideogram is useful when you want to create custom AI visuals. It can help generate graphics, illustrations, or visual concepts for pins when stock photos feel too generic.
If you use AI visuals, try to generate clean backgrounds with space for text. A beautiful image is not enough if there is no room for the headline.
You can also use an Ideogram prompt generator to create better prompts for pin backgrounds, blog graphics, and social media visuals.
LightX Pinterest Pin Maker
LightX Pinterest Pin Maker is another option for creating or refining Pinterest pin designs. It can be useful when you want AI-assisted graphics, text overlays, or more advanced editing options.
A good workflow is to create the base idea with an AI tool, then refine the layout, text, contrast, and branding before exporting.
Tailwind
Tailwind is a Pinterest growth and scheduling platform. It can help with keyword research, pin creation, scheduling, and tracking what is working.
I would not start with automation too early. First, build a clear pin creation workflow. Once you know what posts you promote, how many pins you create, and what designs perform best, scheduling tools become more useful.
My Simple Pinterest Pin Creation Workflow
Over time, I learned that making good pins is not about designing from scratch every time. It is about having a repeatable system.
- Choose the blog post. Pick posts that match your traffic goals, affiliate goals, or content clusters.
- Write several pin headlines. Test practical, emotional, list-based, and curiosity-driven angles.
- Create the first design in this free Pinterest Pin Maker. Choose a template, add the headline, and customize the design.
- Create 3–5 variations. Change the title, colors, layout, or background image.
- Check mobile readability. Make sure the headline is large, clear, and easy to read.
- Download the pins. Export your designs as PNG or JPG.
- Upload and optimize on Pinterest. Add a keyword-rich title, description, and destination URL.
- Track results. Look at outbound clicks, saves, and which designs bring traffic.
If you are building a full content system, you can combine Pinterest pins with AI blog writing, ChatGPT prompts for blog posts, and blog post to video workflows.
How This Tool Helps Bloggers Save Time
Creating pins manually can become repetitive. You choose a template, change the font, adjust the image, rewrite the title, move the text, export the pin, and then realize it does not look readable on mobile.
This free Pinterest Pin Maker helps simplify the process by giving you:
- Ready-made template styles
- Standard Pinterest pin sizes
- Text fields for headlines, subtitles, labels, branding, and CTAs
- Background image upload
- Logo upload
- Color and overlay controls
- Live preview
- PNG and JPG download
It is especially useful when you want to create pins for blog posts, affiliate content, digital products, lead magnets, newsletters, and social media promotions.
You can also pair it with other free tools, such as a free AI social media post generator or Facebook post generator, to repurpose the same idea across multiple platforms.
What Makes a Pinterest Pin Clickable?
A clickable pin is not always the most beautiful pin. Some of the pins I liked the most did not perform well, while simple pins with clear headlines brought more clicks.
Pinterest is not a design contest. A beautiful pin with a vague headline may lose to a simple pin with a clear promise.
For example, this headline is vague:
Improve Your Blogging Journey
A stronger version would be:
7 Blogging Mistakes That Keep You Stuck
The second headline tells the reader exactly why they should care. Before spending too much time adjusting the design, ask:
- Is the promise clear?
- Would I click this if I saw it quickly?
- Does the pin solve a problem?
- Does the design match the article?
- Is the headline readable on mobile?
Design matters, but clarity matters more.
Use the Free Pinterest Pin Maker With a Bigger Blogging Workflow
Pinterest pins are only one part of a blogging traffic system. To get better results, connect your pin creation process with your keyword research, content planning, blog promotion, and monetization strategy.
Helpful related guides:
- Pinterest SEO
- Pinterest Marketing Strategy
- Pinterest Affiliate Marketing
- Best AI Tools for Bloggers
- Best AI Writing Tools
- Digital Product Ideas for Bloggers
- Lead Magnet Ideas
The more connected your workflow is, the easier it becomes to turn one blog post into multiple traffic assets.
FAQ
Is this Pinterest Pin Maker free?
Yes. You can use this Pinterest Pin Maker for free to create and download pin designs.
Can I upload my own image?
Yes. You can upload your own background image and customize the text, colors, layout, and branding.
Can I download the pin as PNG or JPG?
Yes. The tool lets you download your Pinterest pin design as PNG or JPG.
What is the best Pinterest pin size?
A common Pinterest pin size is 1000 × 1500 pixels, which uses a 2:3 ratio.
Do I need design experience?
No. The tool is designed for bloggers and creators who want to make pins quickly using templates.
Can I use this for affiliate pins?
Yes. You can use the tool to create affiliate product pins, blog post pins, lead magnet pins, and promotional graphics.
Can I use the same design for Instagram?
Yes. The tool includes Instagram Post and Instagram Story sizes, so you can repurpose your design for other platforms.
Conclusion: Create Pinterest Pins Without Losing Hours
Creating Pinterest pins should not take an entire day. With this free Pinterest Pin Maker, you can create simple, branded, and scroll-stopping pins directly from your browser.
Start with a clear headline, choose a template, customize the design, upload your image or logo, and download your pin instantly.
You can also combine this free tool with other Pinterest design, AI image, and scheduling tools if you want a more advanced workflow. But for quick blog pins, affiliate pins, and social media graphics, this tool gives you a simple place to start.
Try the tool above, create your first pin, and use it to promote your next blog post.